PILANDESレッグプルバック 実践ガイド • Leg Pull Back
Apr 13, 2026[Original English below]
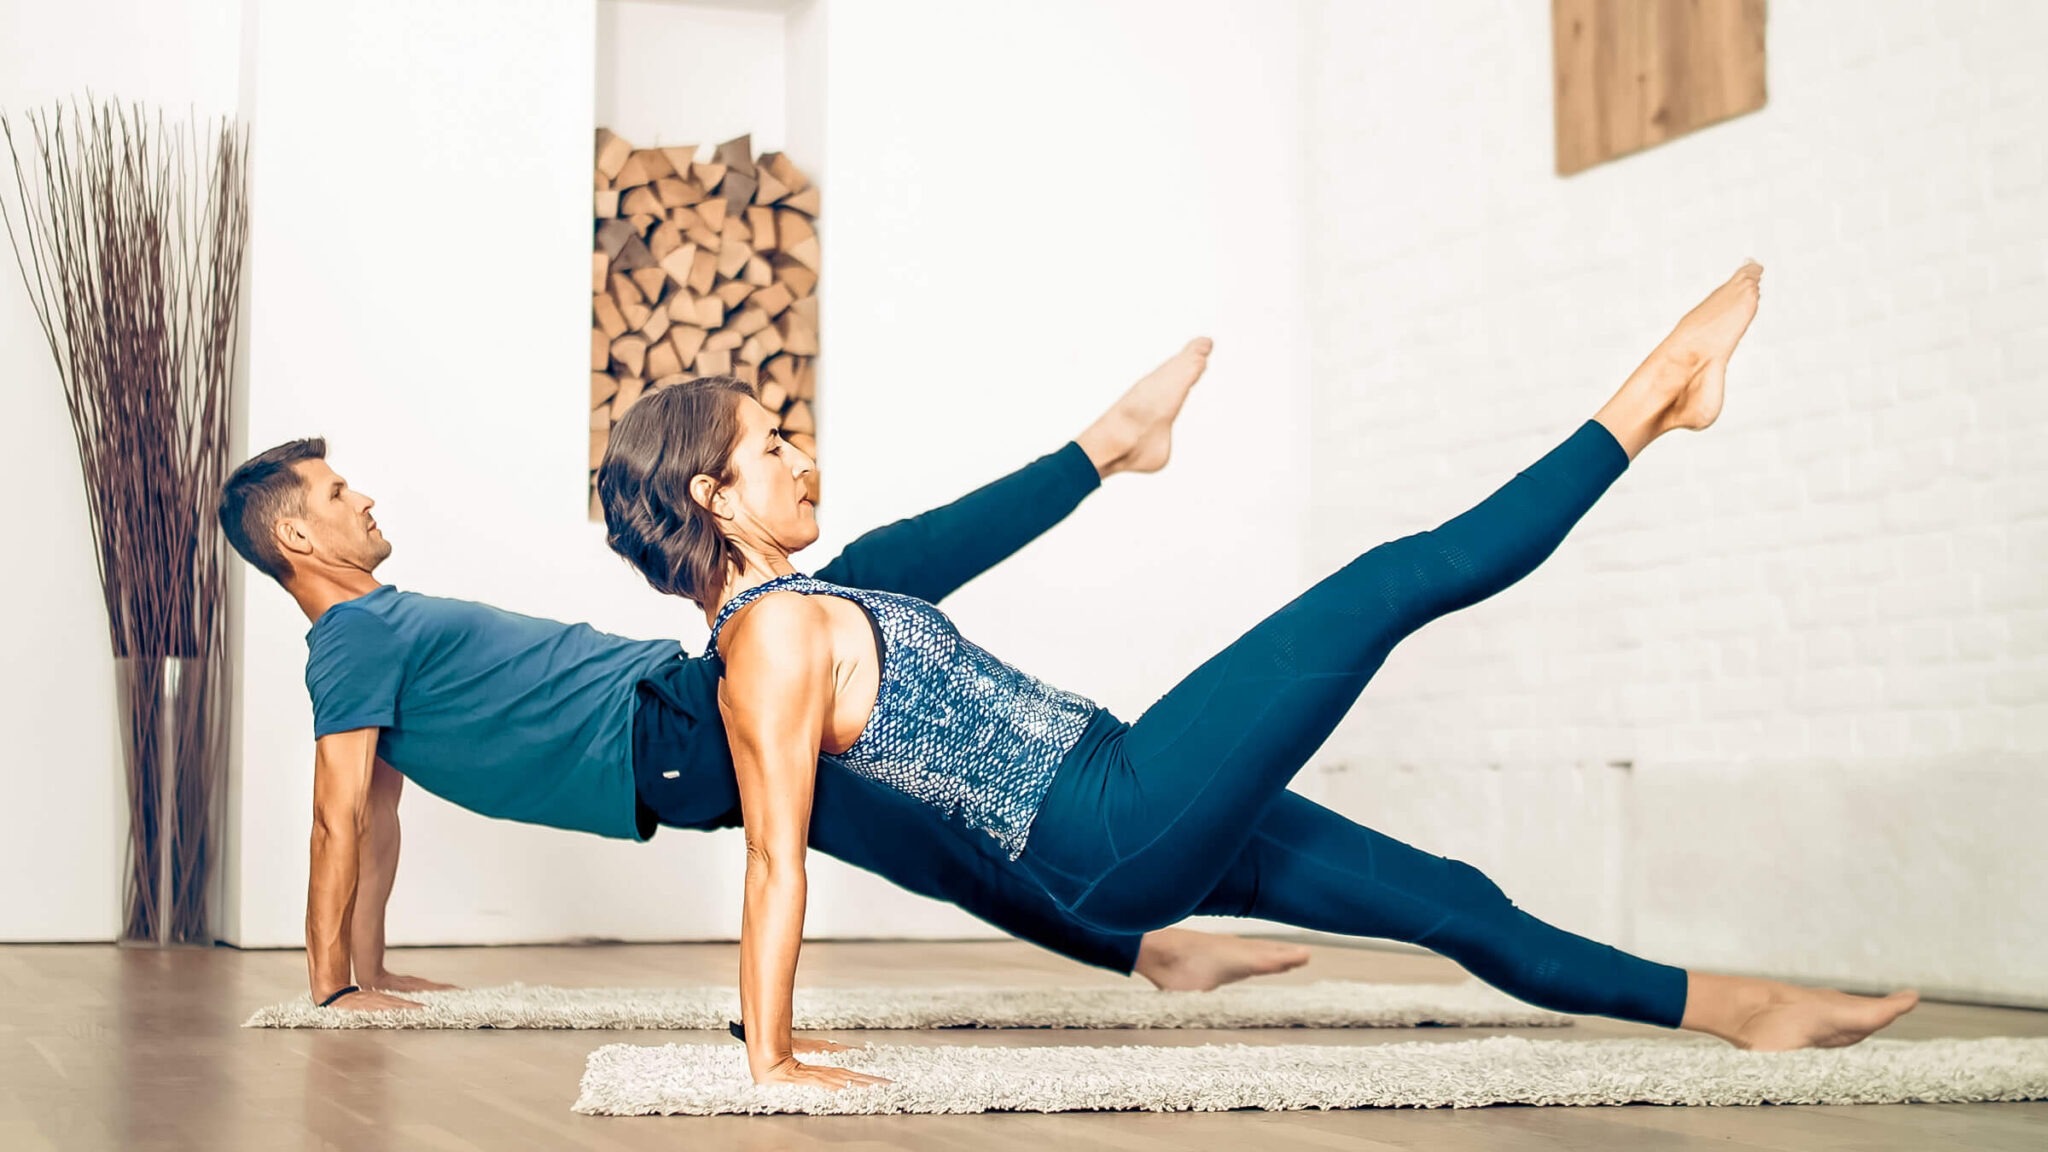
上の写真のように、レッグプルバックは腕に大きな負荷をかけるエクササイズだ。
以前、PILANDESのBodyMappingの一環として、腕は肩の下からではなく、首のつけ根にあるWing Joints(ウィング関節)(胸鎖関節)を支点として動いていることをお伝えした。多くの人が信じているように、上腕骨頭関節(肩関節)からではない。
これはレッグプルバックを行う際に、実際の動きに大きな違いをもたらす。
実際、腕に体重をかけるピラティスのエクササイズはすべて、正確なPILANDESのBodyMappingと姿勢のキューイングによって劇的に改善される。
では、何を意識すればいいのか。
姿勢運動システム(PMS)全体が活性化される中で、2つの重要なポイントがある:
A. 肩甲骨を含む腕全体が、ウィング関節を中心に前方・上方へと弧を描くように動くさまをイメージする。腕の動きは、肩甲骨が向いている方向に従う。
B. エクササイズを開始して手を後ろに置くとき、上腕骨頭関節で伸展しながら、同時にウィング関節での後退・下制を最小限に抑えるようにして行う。
POINT A
これを理解するには、まず2枚の肩甲骨がどのように肋骨の上に位置しているかを、正確にBodyMappingする必要がある。
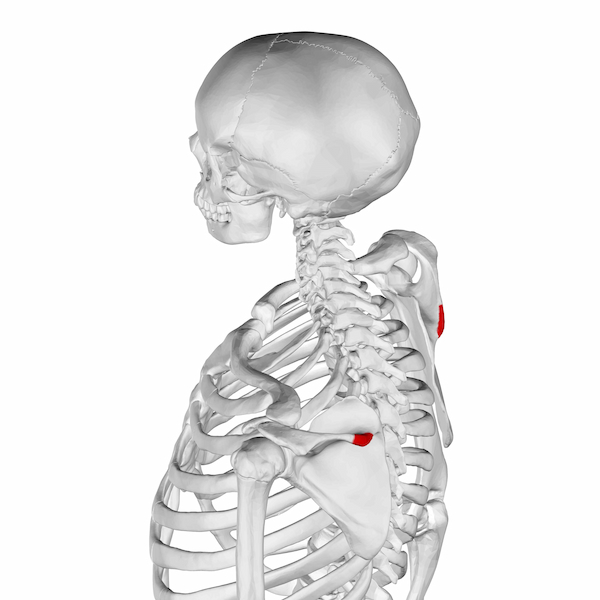
肩甲骨は実際には背中ではなく、体の側面に位置していることに気づくだろう。多くの画像はこの角度を正確に伝えていない。解剖学の教科書では、肩甲骨が肋骨の背面にぴったりと平らに乗っているように描かれている。しかし実際はそうではない。
近くに人がいれば、次のエクササイズで実際の位置を確かめてほしい……
エクササイズ
後ろに立ってもらい、その人に両手をあなたの2枚の肩甲骨の上に軽く乗せてもらう。親指が肩甲骨の内側の縁をなぞり、指は骨全体を覆うように回り込み、肩の先端(肩峰)まで届くようにする。
その人は手をその位置に保ったまま、あなたが歩いて離れる。振り返って、その手がどの方向を向いているかを見てみよう。多くの人が2つのことに驚く:
肩甲骨は想像よりもはるかに離れている;
肩甲骨は背中に平らに乗っているのではなく、肋骨の縁に沿って横向きに位置している。
これでレッグプルバックを試す準備ができた。
POINT B
エクササイズの冒頭、この動きをうまくセットアップできるかどうかが決まる。マットに座った後、最初の動作は両手を腰の後ろに置くことだ。骨盤を持ち上げてブリッジを作るために、体重を支える準備をする。この動きをこれから詳しく説明しよう……
鍵となるのは、上腕骨頭関節での動きとウィング関節での動きを区別することだ。肩甲骨を引き寄せるように、あるいは肩を内旋させるように(同じことだが)指導されてきたかもしれない。しかしそうすると、鎖骨が後方・下方へ引っ張られ、ウィング関節での後退・下制が強まる。その結果、腕は体幹との均衡のとれた内側のつながりを失い、統合が崩れ、局所的な圧力が増す。
代わりに、手を後ろの床に置く際には、上腕骨頭関節で伸展しながら行う。それと同時に、ウィング関節での挙上と前方突出を促す。
鎖骨を後方・下方へ動かすのではなく、前方・上方へと送る。これがこのエクササイズで応用する、PILANDESの核心にある姿勢的洞察だ。
最初はこれが直感に反するように感じるだろう。腕を同時に2つの反対方向に動かそうとしているように思えるかもしれない。そう、実際にそうなのだ。ただし、異なる関節において。そしてそれは完全に可能だ。
実はそのように設計されているのだから!
これができると、骨盤を持ち上げてレッグプルバックの体勢を整える間も、腕が体幹全体と統合されたまま保たれる。正しくできたとき、腕だけで孤立して支えているのではなく、体全体で支えられている感覚が生まれる。
Trialにお越しの際は、ぜひ一緒に実際に試してみよう。
***
このような具体的なマニュアルを書くことは普段あまりない。でも、友人と一緒に試せるよう、また、PILANDESマットで学ぶことへの理解を深めてもらえるよう、これからいくつか書いていく予定だ。毎週火曜日の午前中に東京で、毎週木曜日の午前中に大阪で、一人か二人のゲストにPILANDESセッションを体験していただいている。ご自身がPILANDESマットに参加したいかどうかを判断するには、これが一番の方法だ。
日程と時間は、以下の予約ページでご確認いただけます:
次回:PILANDESの3つの柱 - タッチ
乞うご期待。
[Original English]
PILANDES - Leg Pulled Back
The Leg Pull Back exercise - shown above - puts tremendous pressure on your arms.
Previously - as part of PILANDES BodyMapping - I clarified that your arm begins pivoting just below your neck at the Wing (sternoclavicular) Joints. Not from the glenohumeral (shoulder) joint, as many people believe.
This has real-life consequences when performing Leg Pull Back.
In fact, any Pilates exercise that calls for weight-bearing through your arm will be dramatically improved by accurate PILANDES BodyMapping and postural cueing.
So what should you be thinking about?
The two key points - as your whole Postural Movement System (PMS) is being energised:
A. Visualise the movement of your entire arm - shoulders included - pivoting forward and up around the Wing Joints - they follow the direction your scapulae are pointing.
B. When first starting the exercise and placing your hands behind you, do this by extending at the glenohumeral joint while minimising any retraction/depression at the Wing Joints.
POINT A
To understand this, you first need an accurate map of how the two scapulae are positioned over your ribs.
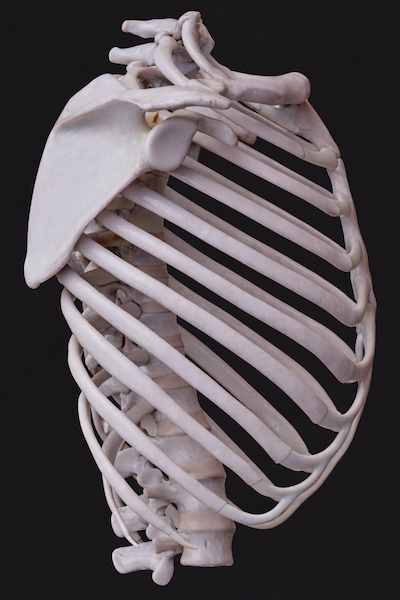
Notice how your scapula is not actually at the back, but at your side. Most images we see fail to communicate this angle. In anatomical textbooks, the scapula looks as though it sits flat across the back of the ribs. It doesn’t.
If you have someone nearby, try this exercise to discover how it actually sits…
EXERCISE
Have someone stand behind you and lightly place their hands over the top of your two scapulas. Their thumb traces the inside edge of your scapula, while their fingers wrap around - covering the whole bone - so their fingers reach up to the tip of your shoulder at the acromion.
The person keeps their hands in this position as you walk away, turn around and look at how those hands are orientated. People are often surprised by two things:
1. The scapulae are much further apart than they imagine;
2. The scapulae are not flat on the back, but sit more sideways around the edges of the rib cage.
Now you are ready to try Leg Pull Back.
POINT B
It is at the very start of the exercise that you will set this up well or not. Your first action, after sitting on the mat, is to place your two hands behind your hips, ready to support the weight of your body as you bring your pelvis up to make the bridge. This is the movement that I will now describe in detail…
The key comes from differentiating the movement at the glenohumeral joint from the movement at the Wing Joints. Although you may have been taught to pull the scapulae together, or internally rotate the shoulder in (same thing), doing this increases retraction & depression at the Wing Joints by pulling the clavicle backwards and downwards posteriorly, with the result that the arm loses a balanced, medial connection with the torso, thereby losing integration and increasing localised pressure.
Instead, you take your hands back to place them behind your hips on the floor by extending at the glenohumeral joint. As you do this, you are simultaneously encouraging elevation and protraction at the Wing Joints.
Instead of the clavicle moving posteriorly (back and down), you are sending it anteriorly (forward and up). This is the key PILANDES postural insight you are applying in this exercise.
At first, this will feel counterintuitive, as though you are trying to move your arm in two opposing directions at the same time. Well, you are - but at different joints, and it’s wholly possible.
In fact, it’s designed that way so you can!
When you succeed in this, your arms stay integrated with your whole torso as you lift up the pelvis and position yourself ready for the Leg Pull Back. When done correctly, you will feel a sense of all of you being supported, not just an isolated effort in your arms.
When you come to a Trial, ask me to demonstrate this with you.
***
I don’t usually write such specific manuals, but I plan to do a few so you can experiment with a friend and get some insights into what you will be learning in PILANDES Mat. Every Tuesday morning in Tokyo, and every Thursday morning in Osaka, we will allow one or two guests to experience a PILANDES session. This is the best way to decide if you want to join the PILANDES Mat.
Dates and times are shown on the booking pages here:
NEXT: The 3 Pillars of PILANDES
Stay tuned.
21通のPILANDES手紙
ジェレミー・チャンスより
Pilatesはあなたがすること。PILANDESはその方法
個人情報は厳重に管理し、第三者への提供は一切行いません。
